Here you can define a set of Event Triggers to be stored along with the measurements. Click on Trigger setup from the left menu:

Event trigger setup, empty
In acoustics, an event is a significant change in the sound level for more than a minimum period of time. The amount of level change required is predefined by you by setting a threshold level. Hence, the purpose of the event triggers is to start an action based on such an event. A typical action can be to start an audio recording, take a picture or simply send a warning message on email or sms.
Please read the manual for the instrument you use about how the triggers work before setting up a trigger in NorCloud.
Trigger (Events Triggers)
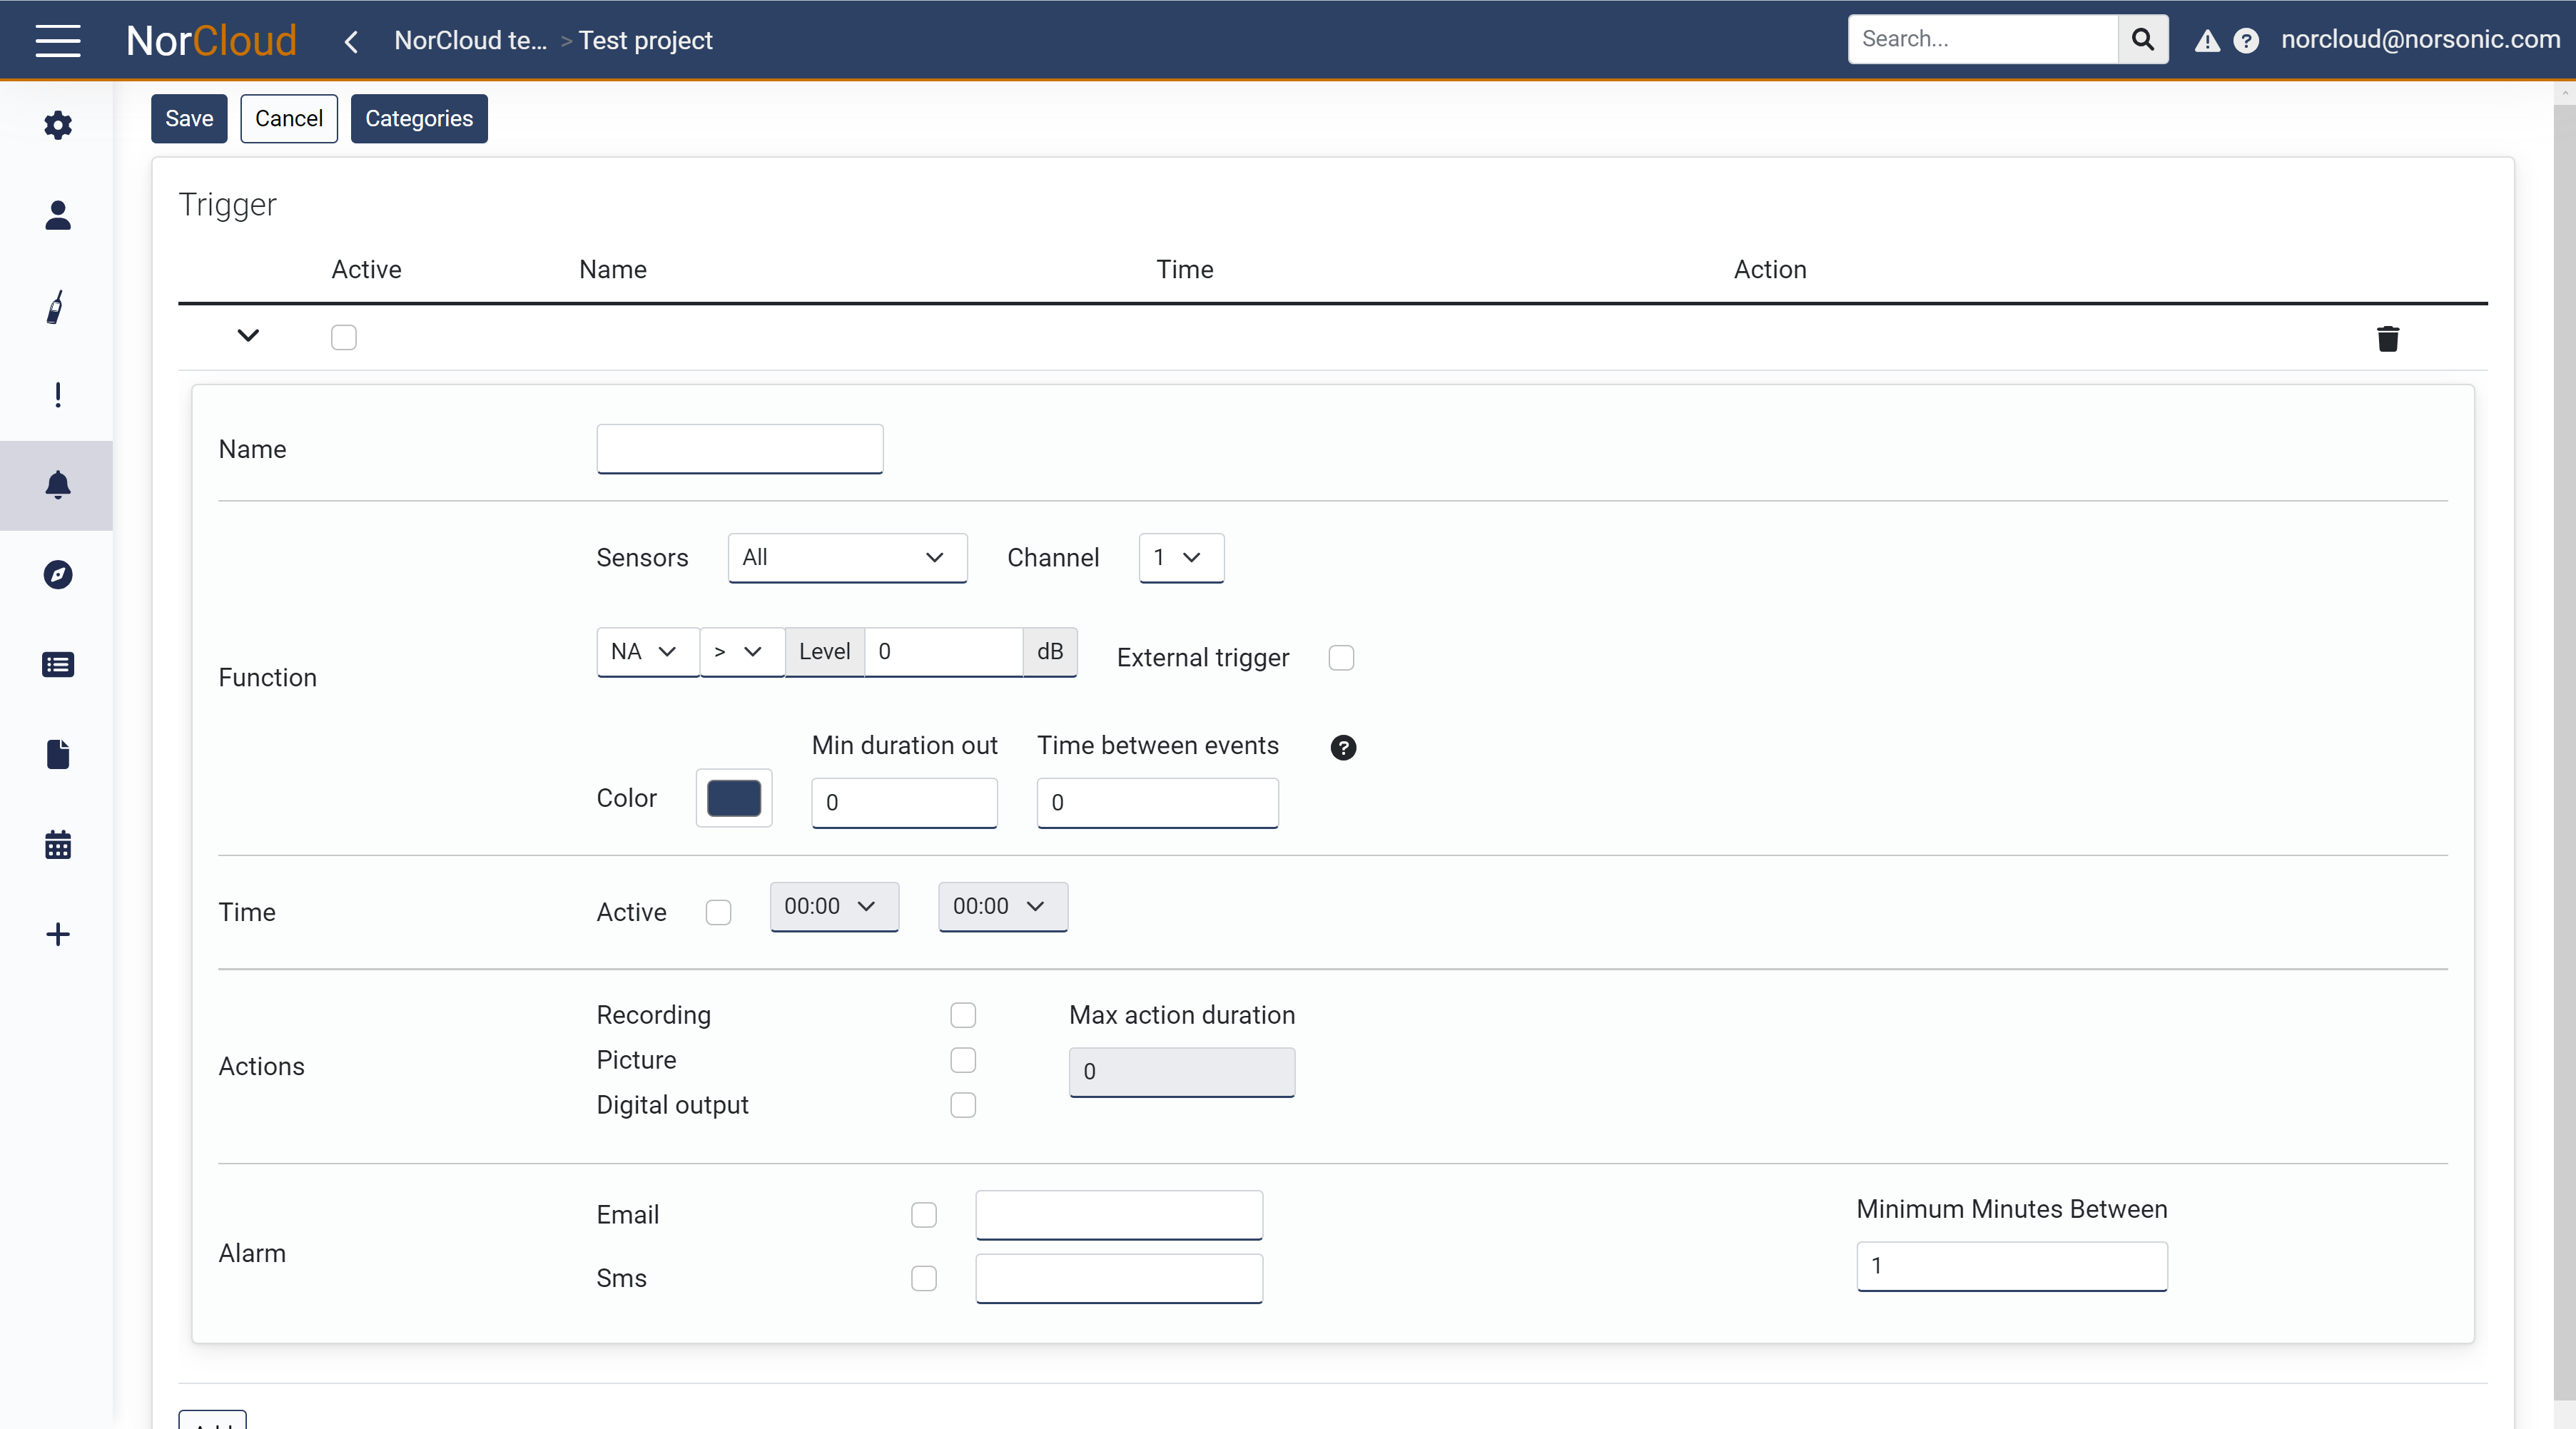
To add an Event trigger, click on the Add button and press the expand button to view the settings for a new event trigger:

Event trigger setup, adding a new trigger
Field name |
Optional / Required |
Data in field |
Information |
|---|---|---|---|
Name |
Required |
Text |
The name of the trigger that will be displayed in the Event list. |
Function - Sensors and channel |
Required |
All or Sensor name, channel number |
Select all sensors or a specific sensor to which the event trigger is enabled. |
Function (trigger setting) |
Required |
Select profile, function, operator and threshold level |
First select if you want the trigger to be a (normal) level trigger, external or a noise compass trigger. It is not recommended to put a trigger on global profile as it would probably not work as expected. Use profileA, profileB or Moving. |
Function - Color |
Required |
Color |
This is the color of the dashed trigger line displayed in the project dashboard graph. It is recommended to use the same color as the function line it triggers on. |
Function - Min duration out |
Required |
Number of seconds |
Get more information about event-related terminology here. |
Function - Time between events |
Required |
Number of seconds |
Get more information about event-related terminology here. |
Time - Active |
Optional |
On or off, select time from and to |
Each trigger is connected to the real time clock on the sensor. This means that you can set one trigger level for a certain period of the day, and another one for the evening and a third one for the night, or simply turn off the event trigger for a certain period of the day. |
Actions - Recording |
Optional |
On or off |
Check this to make the instrument store an audio recording. If you want to automatically upload the recording to NorCloud, please ensure the max duration is not too long, see below, and that the project settings enables upload of all media or audio recording to NorCloud. The audio recording setting is disabled if you use continuous recording, since it's always recording then. |
Actions - Picture |
Optional |
On or off |
For the event Action "Picture" you will need to configure an IP camera in the instrument menu. |
Actions - Digital output |
Optional |
On or off |
The Digital output on Nor145/Nor150 must be set to “Event/Markers” in the SETUP > Instrument > Digital and Analog I/O menu. More info is in the sensor manual for how the digital output works. |
Actions - Max action duration |
Optional |
Number of seconds |
This is the number of seconds that will be the maximum length of a recording. Please keep in mind that an event might be longer than this. For recordings to be uploaded automatically to NorCloud, there is a limit to 30 seconds. If you want longer recordings, they need to be stored on the instrument. However, they can be manually uploaded later if they are not too large. More information about recording here. |
Action - AutoAssignCategory |
Optional |
List of categories |
Choose an event category to put this event into. If no categories are created, this option will be hidden. |
Alarm - Email |
Optional |
On or off and text |
Several emails can be separated by space or comma. |
Alarm - Sms |
Optional |
On or off and text |
Phone numbers to where an SMS will be sent if the trigger occurs. Several numbers can be separated by space or comma. |
Alarm - Minimum Minutes Between |
Required |
Number of minutes |
This is the minimum number of minutes between events before another alarm is created. |
Remember to activate the trigger when setting it up.
Click on Save to save the event trigger setup, i.e., write them to the instrument and NorCloud, or cancel to discard the changes.
Whenever changes to the trigger setup are made and the sensor is online (green), the sensor indicator will turn yellow for a few seconds, writing the new trigger setup before going green again and continue the measurements.
Please Note:
You expand and collapse the trigger to see its details, by clicking the or
symbol that you find to the left of the trigger name.
An event trigger is activated by checking the Active tick box. It can also temporarily be set to "non active" by
unchecking the same tick box.
To permanently delete a Trigger you click the Delete icon in the top right corner of that event. This action cannot be undone.