If the instrument has a Noise compass connected and running version 5.0.3016 or later, it is possible to add a trigger on either the profileB or Moving profiles.
Please note that setting up a noise compass trigger will overwrite the original profileB or moving data on from the instrument.
First, you define the Noise compass settings for triggers:
1.Set the instrument up with the Noise compass. Also add sectors to it.
2.If you're not in the Noise compass page, click the ![]() on the left menu to get there.
on the left menu to get there.
3.Select the Sensor and Channel you want to have the trigger on under Edit Noise compass, e.g., MP2-Nor145-TIP in the picture below.
4.In the down left area you have the heading Edit Noise compass trigger.
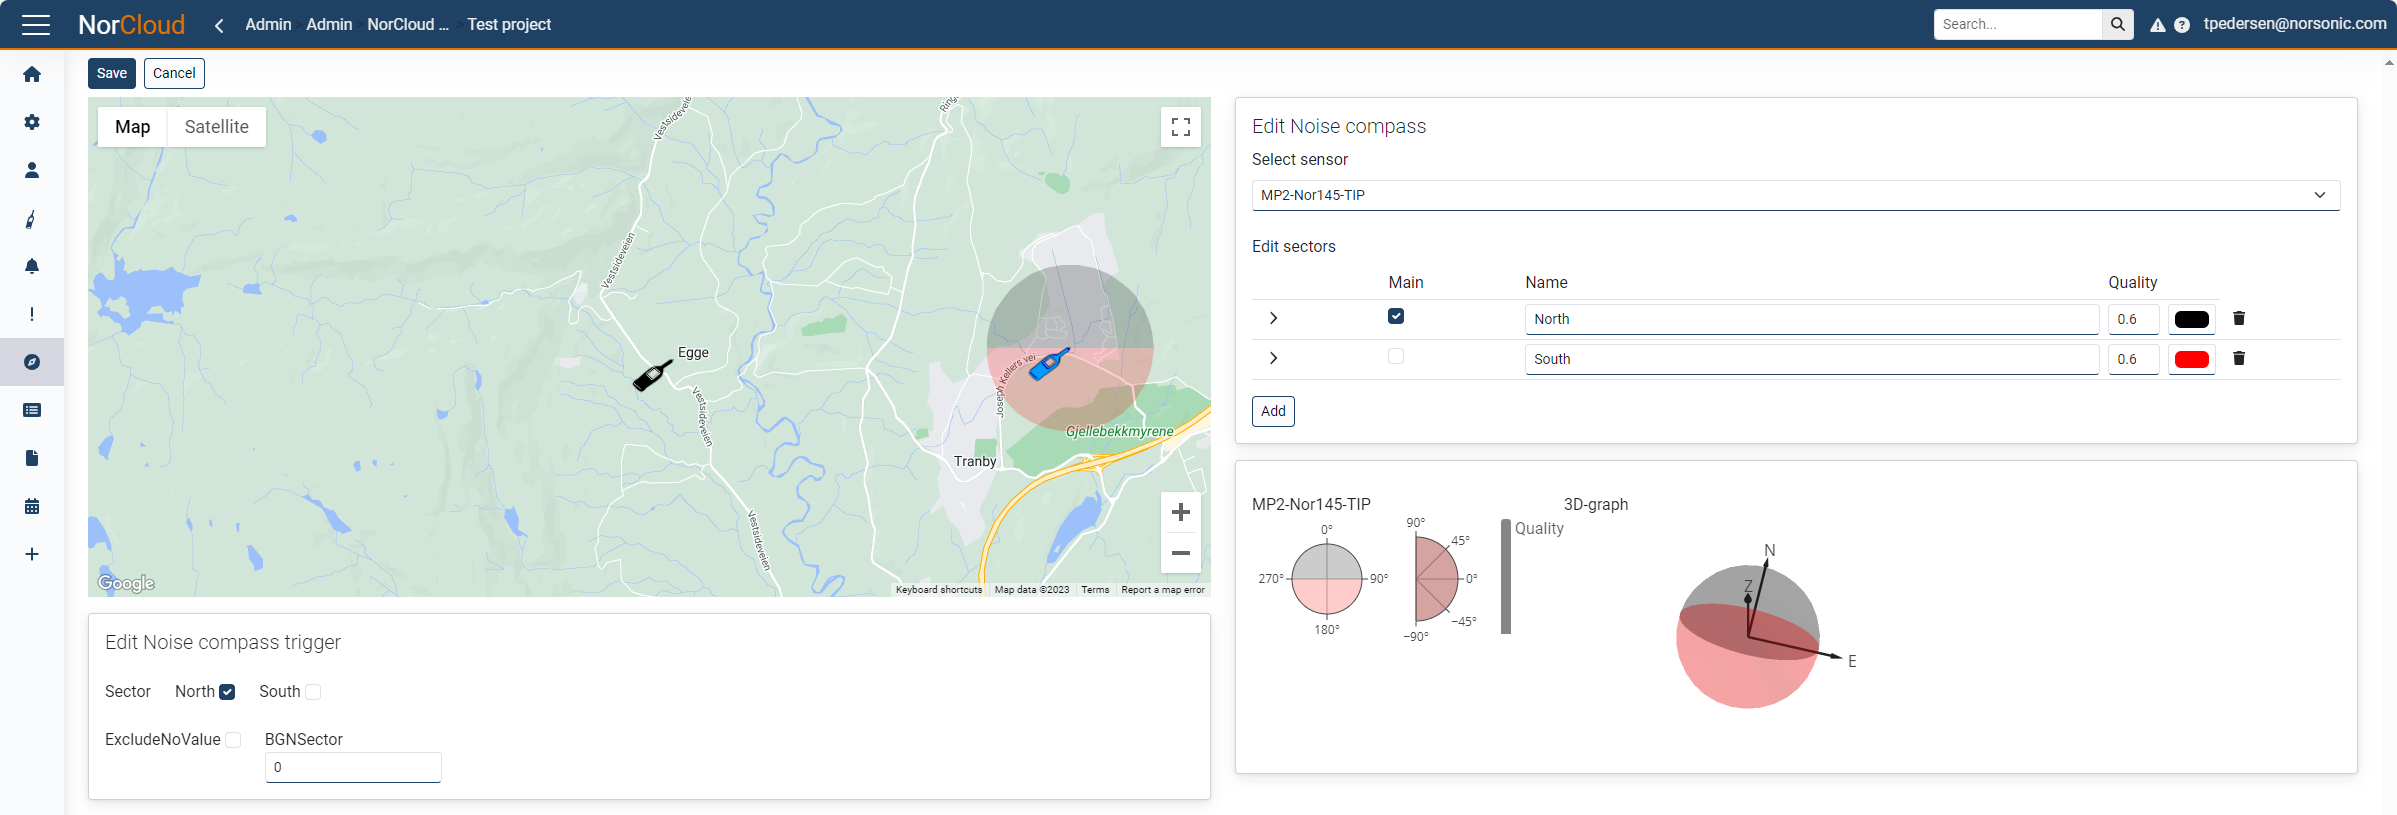
5.Select the Sector you want to have the trigger on. Only one sector is supported for triggers. Creating noise compass triggers with different sectors will result in one of the sectors being selected for all triggers.
6.Select if you want to exclude no-values or not. No-values will occur if the noise compass is not pointing in the selected sector direction and it is above the given quality requirement for the other sectors in any samples during the evaluated profile (B or Moving). If no-values are excluded the duration of the noise compass measurement data will not be the same in between them, meaning they are not directly comparable.
7.BGNSector stands for background noise for sector. If the noise compass is not pointing in the selected sector direction and it is above the given quality requirement for the other sectors, it will be given this dB value. Default value is 0 dB. If ExcludeNoValue is checked, this value will be disabled and ignored.
8.Press Save to save the setup and go back to the Dashboard.
Then, you go to the trigger setup:
1.Enter the ![]() Trigger setup.
Trigger setup.
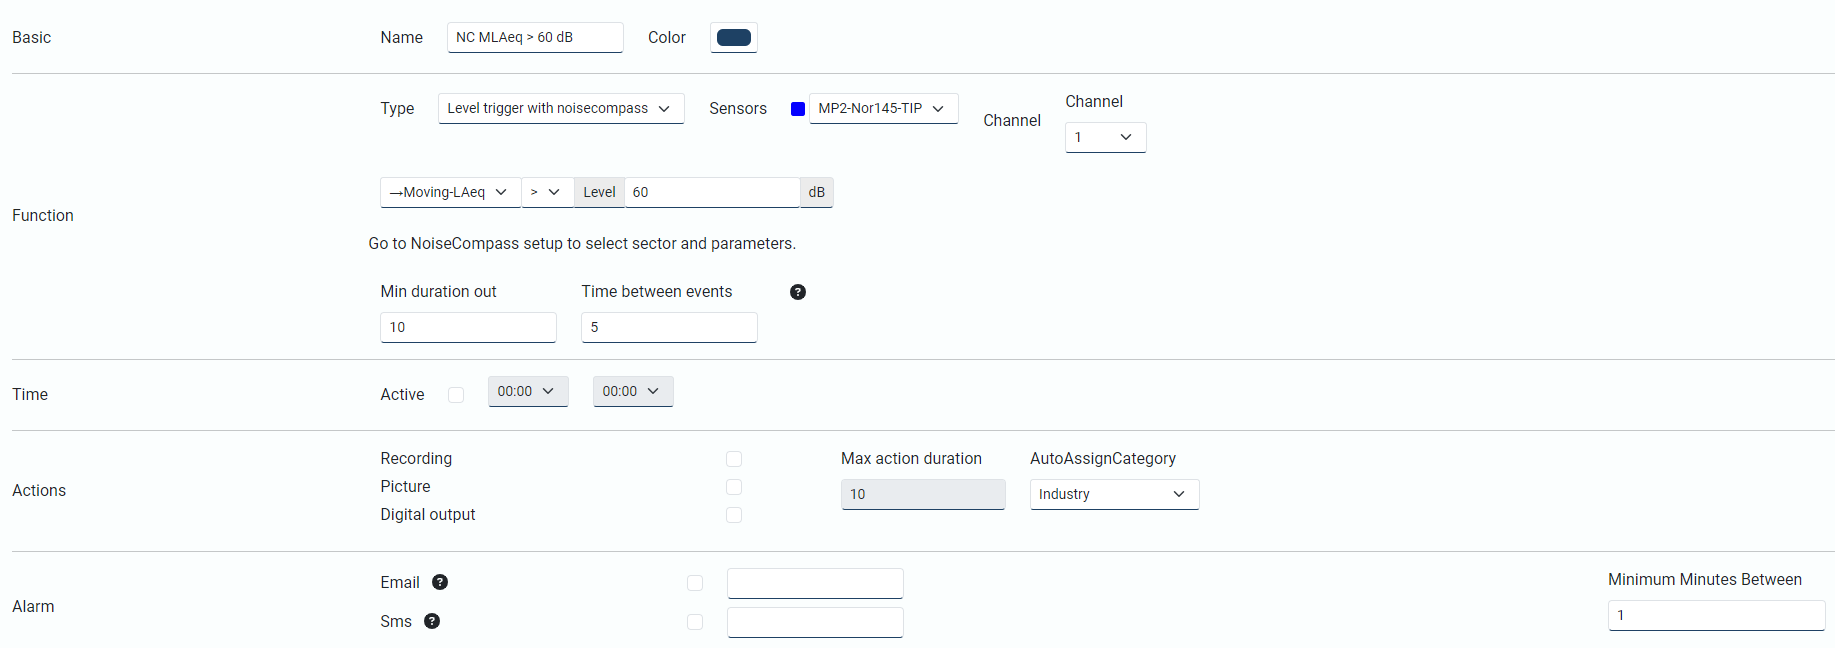
2.Click on the Add button to add a new trigger.
3.Choose Type Level trigger with noisecompass and select the same sensor you set up above, or another sensor having set up a Noise compass.
4.Select the Profile and function you want to have the trigger on along with the level threshold.
5.The rest of the settings are explained in the Trigger setup menu.
6.Remember to enable the trigger (or leave it disabled for later use) and press Save to save the setup and go back to the Dashboard.
After adding a noise compass trigger, the data view having profileB or moving will show the results from the noise compass trigger setup. It is not possible to have a normal profileB or moving (without Noise compass) in data view for direct comparison. However, it is possible to create a report with both a calculated profileB or moving using profileX or movingX.