To add a sensor you first have to create a Project and the instrument must be set up to use NorCloud. When you are within a project, click the symbol in the left vertical menu to add a sensor.
Select the sensor, verify the stored details change what is needed, and click Save.
If you need to edit these settings later, click on the ![]() icon or name in the sensor list and then the
icon or name in the sensor list and then the Edit sound sensor icon from the left menu.

Edit sound sensor
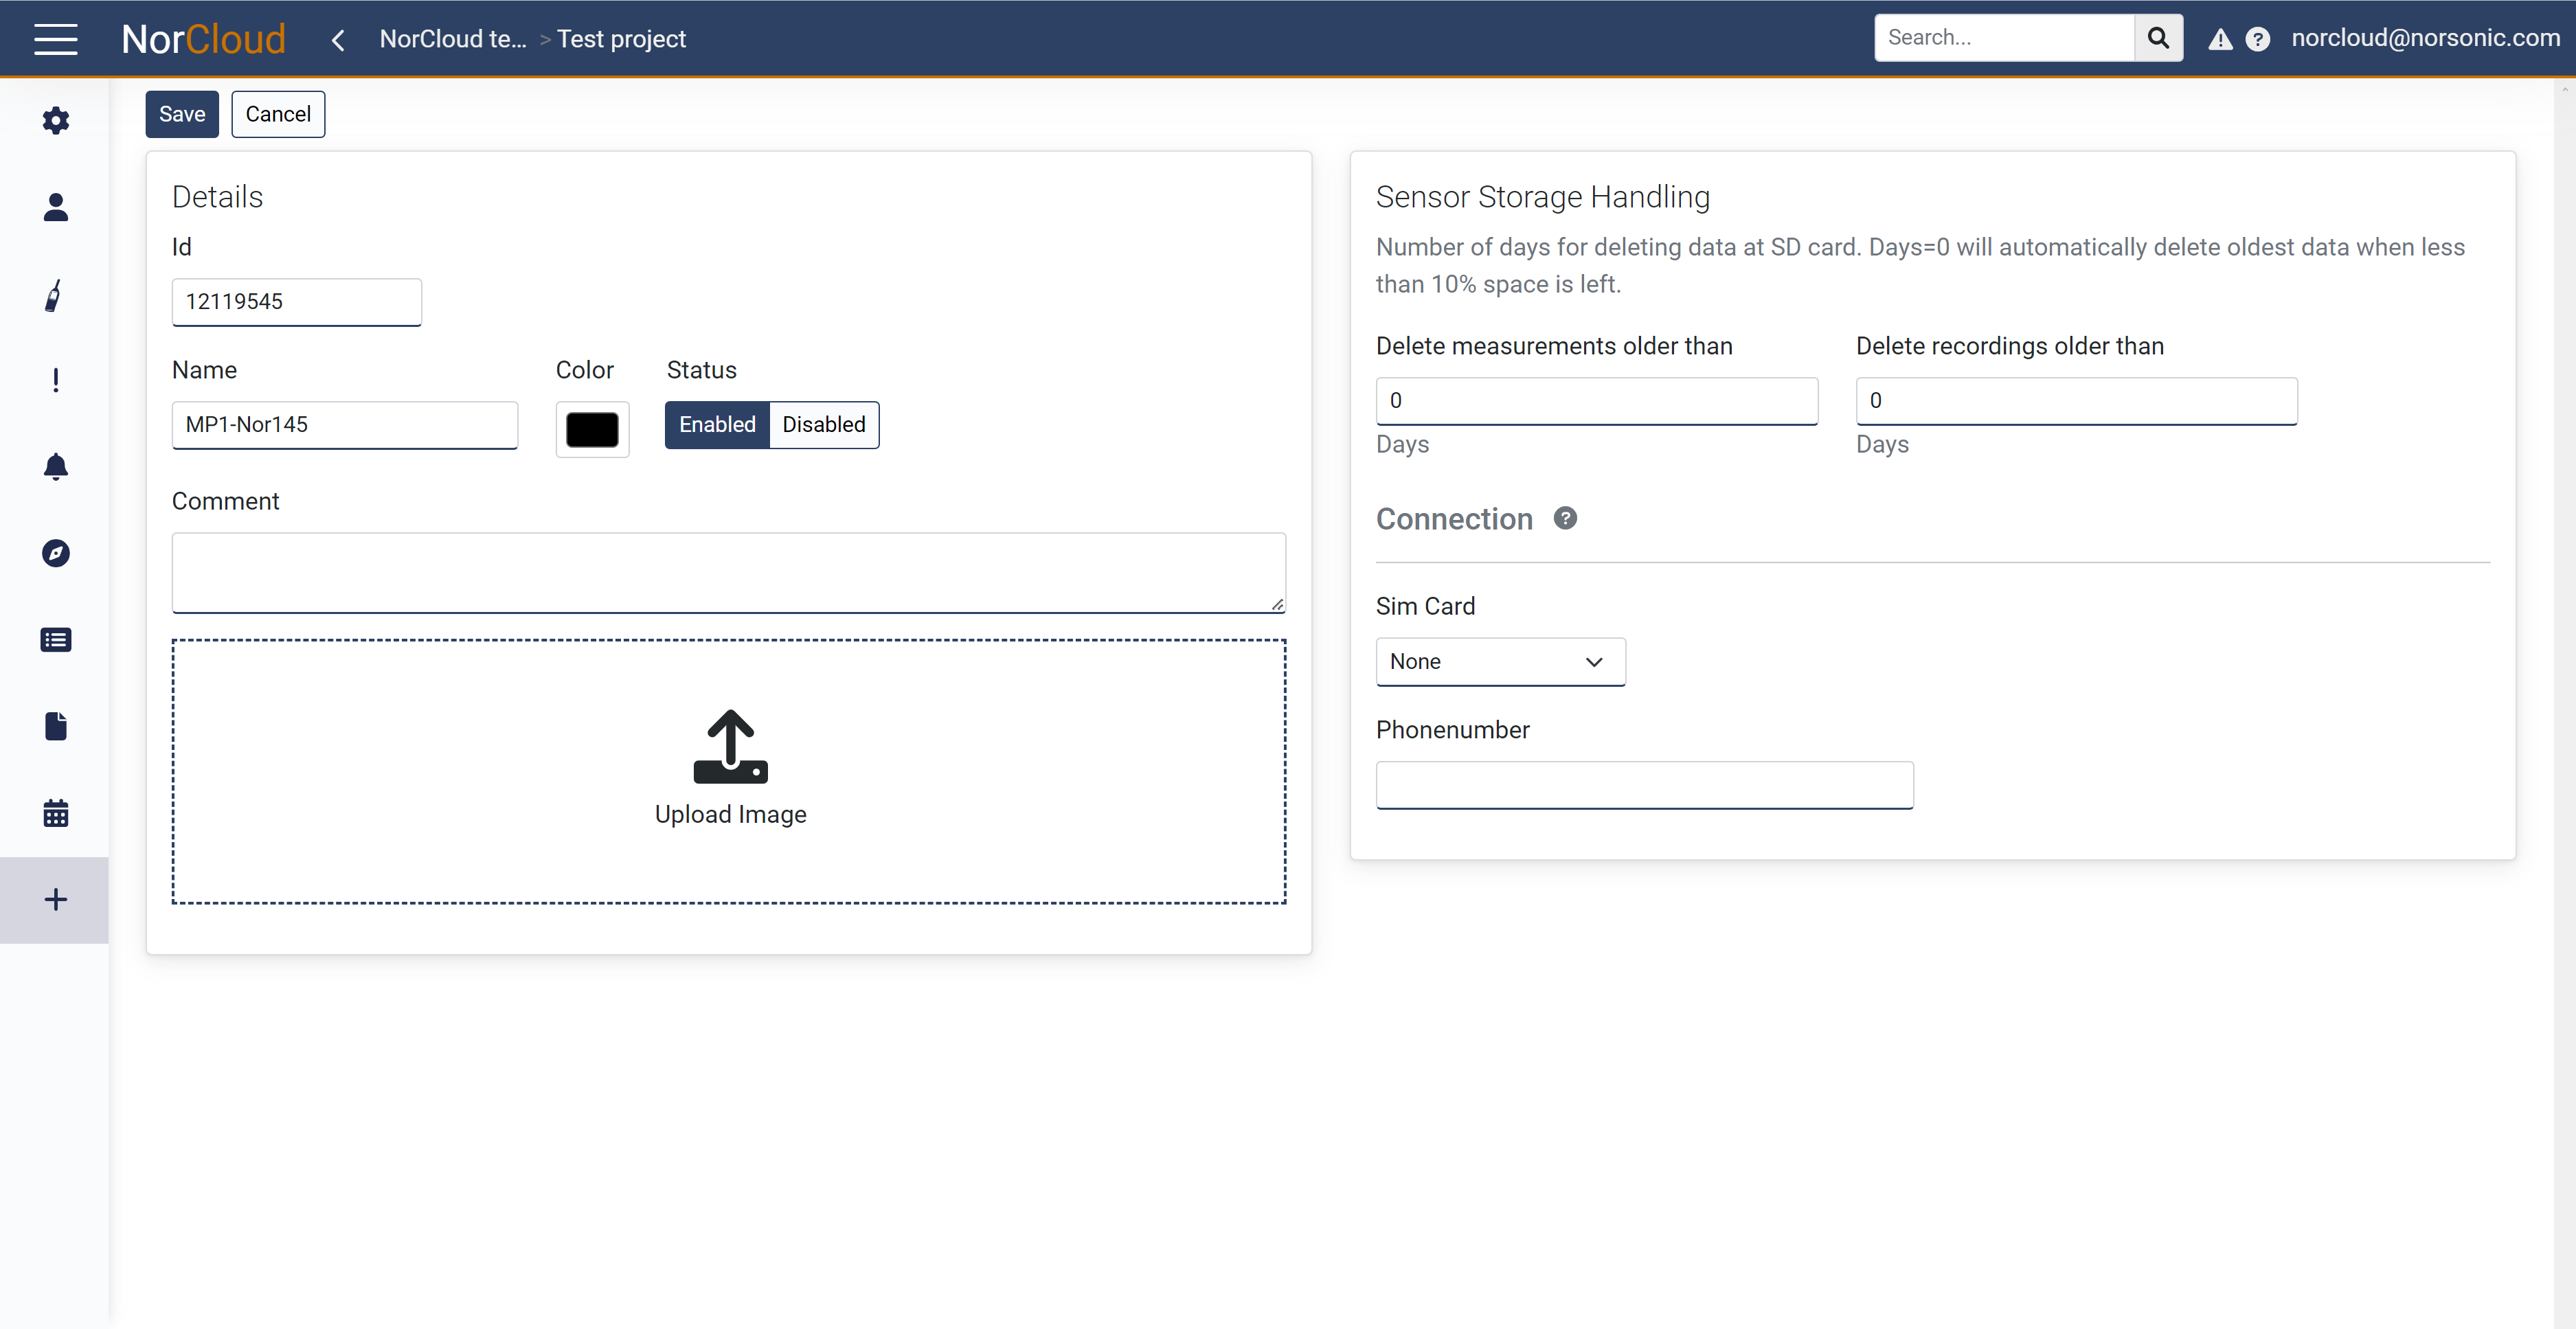
To add a new sensor you must complete the required settings from the table below:
Field name |
Optional / Required |
Data in field |
Information |
|---|---|---|---|
Id |
Optional |
Number |
Unique Instrument Id that NorCloud uses to establish connection with the instrument. |
Name |
Required |
String |
Name of your choice on this Instrument (Instrument Name is displayed in alarms and events). |
Color |
Required |
Color |
This color is used as plot color in Graph and instrument color in the sensor overview and the map. |
Status |
Required |
Enabled/Disabled |
Set this to Enabled if you want the instrument to be available/active in the project. Set this to Disabled if you want the sensor to be unavailable/historical in the project. You may set it to Enabled/active later or vice versa. |
Comment |
Optional |
String |
Any text |
Device type |
Automatic |
String |
Instrument model, i.e. Nor145 or Nor150. (Links instrument to NorCloud functionality), not possible to edit. |
Upload Image |
Optional |
Upload file |
Add a Picture of the Instrument/test site, that you can later use in the report generator. |
When ![]()
editing a sensor later, you will be given additional options. Read more about them here.
Sensor Storage Handling
These settings are related to the storage (SD card) on the instrument, not what's stored in NorCloud. See the edit project page under Storage management for information about storage in NorCloud.
Field name |
Optional / Required |
Data in field |
Information |
|---|---|---|---|
Delete measurements older than |
Required |
Number |
By default with x=0 as the number, the oldest data on the instruments SD card will be deleted when free space is less than 10%. |
Delete recordings older than |
Required |
Number |
By default with x=0 as the number, the oldest audio recordings on the instruments SD card will be deleted when free space is less than 10%. |
Connection
Your Norsonic Instrument can be connected to internet by one of these methods:
•SIM card
•LAN Ethernet
•WiFi
If a LAN/Ethernet or WiFi connection is chosen, please set SIM card to "None".
If a SIM card connection is to be used, please select the correct SIM card type:
•Normal (when you are using a simple SIM card)
•Public (if you are using a SIM card with Public IP)
•VPN (if you are using a SIM card with VPN. Must be agreed with Norsonic)
All above connections requires that the instrument is set up correctly, and that the instrument have the right options installed. Here you can read more about how to prepare the Instrument for NorCloud.
When ![]()
editing a sensor later, you will be given additional options below here as well. Read more about them here.