NorCloud can communicate with a series of compatible Norsonic Sound Instruments. Or more correctly, it is the Instrument that connects itself to NorCloud.
Is your instrument a Nor145 (Nor1545) or Nor150 (Nor1531)
1. Ensure you have NorCloud option installed on your instrument.
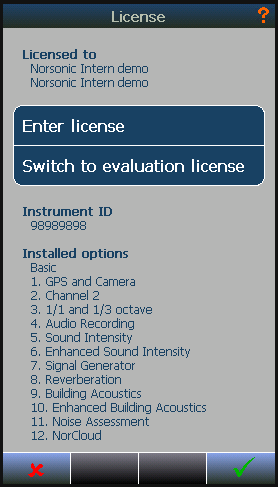
Go to menu: Setup -> Instrument -> About -> License, and you will find a list of all installed options. If option 12, NorCloud, is not found please contact your local Norsonic dealer to obtain a valid activation code.

Figure 1: Verify that option 12. NorCloud is present in the list.
2. Set your instrument in Environmental mode.
Go to menu: Setup - Applications and activate "Environmental" mode by clicking the icon. Select the Default setup. The instrument will now load this setup.
3. Connect your instrument to internet.
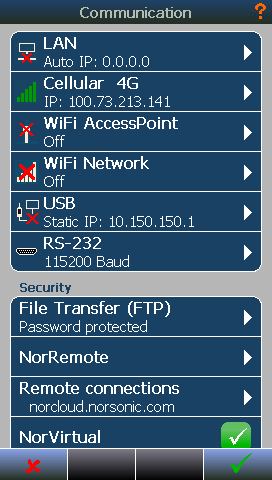
Internet connection can be archived in many ways. By LAN cable, WiFi or 4G (3G) cellular connections via internal modem (Nor145) or via an external modem with a SIM card.
Go to menu: Setup - Instrument - Communication and set up the preferred communication.
4. Know your instrument ID.
Go to Setup - Instrument - About, and you will find on the screen the instrument ID number (8 digits). This number you will need when you add the Instrument to your Project in NorCloud.
Add the Instrument in NorCloud before you move on to the next step.
Do not mix up instrument ID with the instrument serial number.
5. Activate the NorCloud function in the Instrument.
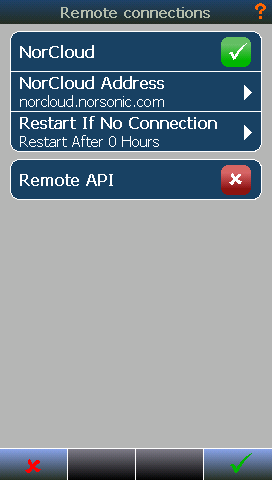
Go to Setup -> Instrument -> Communication -> Remote Connections. It is required to set the NorCloud address to 'norcloud.norsonic.com', and set the NorCloud tick box to checked.


Exit all menus before you power off/ reboot your instrument. Next time the instrument is launched/ powered it will be in "NorCloud mode" trying to connect itself to NorCloud. When connection is established it will load the measurement setup from Sound Setup as is defined in the project in which the sensor is active.
Clock synchronization
Once the instrument is connected to NorCloud, it will synchronize its clock every night at 0300. If the difference is bigger than 0.5 seconds, the clock will be adjusted.